
When Corona was declared a pandemic, I bought a nice roll of antique hand woven linen and started to work on a new panzar, almost hoping to end up in quarantine with it. In short, I took inspiration from the pattern of Charles de Blois pourpoint as I wrote in my last post where I also explained what a panzar is and why I use this term over other ones. I worked with my pattern in trial and error sessions, cutting and hand stitching pieces of thin cotton fabric together, shaping it on my own body until I had a fit I was happy with.


My own pattern
After I had the mockup version in cotton ready, I made two paper versions of that pattern. One ”outer shell” with seam allowance added to it and one ”inner layer” without. I cut the outer layer in my best antique fabric. The inner layers for the ”core” of my panzar consists of several other bits and pieces of second hand linen in varying quality, also hand woven, but washed many times so that they had become soft and supple. I used from 4 to 7 layers of linen over the entire panzar, depending on where I thought mobility or extra protection was most important. The back and the lower arm below the elbow are the sturdiest parts, they won’t need much bending and I don’t have armour to cover them up (yet). The upper arm and shoulder are softer, maybe a little on the thin side, but the mobility is great.


I wanted to put a little padding in the chest and discovered after some testing that on me, a stuffed area about as big as my hand in the upper part of the chest would give just a subtle extra puffines. I’m not sure if I would do this again, I could just tailor the belly nicely and my protruding ribcage would do the job almost as good anyway, but it turned out well in the end. I knew that the thickness of the padding would give me trouble when working the buttonholes down the middle front later, so I decided to try to compensate a little for this by cutting away a strip of the heaviest linen from the ”core” along the buttonhole side, just as wide as I planned to make the buttonholes.

Inside view of the front piece, without the innermost layer linen. I cut away a strip of the heaviest ”core” linen where I planned to make my buttonholes.

Upper and lower back, all layers basted together. Almost all edges are whip-stitched closed after seam allowance have been folded in
I basted toghether all layers in the right order before I folded the seam allowance in over the core linen layers. Next I whip-stitched all around the edges on every piece of the pattern, closing them up, except for the lower parts that I knew I would have to trim later anyway. When I had come this far, it was finally time to prepare a first fitting, to see if I was on the right way.


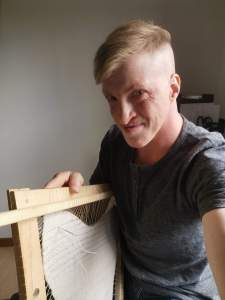
I decided that I was well on my way, I only had to tighten up the side seams and cut the waist a little higher. But except for that, next step would be to get my toolbox out and start building wooden frames. This is where my panzar is different from most, not all, but most that I have seen. The quilting is done one piece at a time once the layers are put together and edges closed. Every piece has a frame especially made to fit for fixing and stretching it out, almost like an embroidery in a frame and for exactly the same reasons.
I’m no carpenter, I did really ugly frames from crap I had close at hand, but it worked. The most important thing is that all parts of the frame must be in the same level or else the tension will be uneven when you do the quilting and you could just as well skip this part. It won’t work unless every piece can be fixed flat. But when it works, it works like magic, it makes everything SO MUCH EASIER. It took some time to make the frames, but I have no regrets what so ever.


I hope you are asking yourself right now if they really did it this way, back in the 14th century, are you? The thing is that I haven’t been able to find a single contemporary depiction of textile armour in the making, so I had nothing to go on as for clues to methods of construction. A friend said he might have seen one, but then forgot where it was (story of my life, I always forget!)… But I do know that good quality medieval crafts was highly specialized. Professionals would have an interest in not revealing their business secrets. I haven’t seen panzar being made in a frame, nor have I seen it depicted being made in any other way. The fact that none of my friends have been able to produce a picture of how a panzar was made is truly a mystery, so if you have one, please let me know ok?
 When we don’t know, we are left to guess or deduce our theories from other sources. My friends at indemejarecristi have hinted that a clue could possibly be that other quilted stuff would be stitched in a wooden frame, all stretched out, like an embroidery. It totally makes sense. When your project is fixed in the frame there is no need for you to hold or stretch the fabric. I quickly learned to work sitting on a chair, clasping the frame in between my knees. This way I could see either side of the fabric and work the needle with both hands. Another advantage of stretching the pieces out in frames is that you have control over any shrinkage that might happen and you can make sure that you draw your stitching lines evenly on both sides without the fabric moving around and messing it up. I used a pair of compasses and started drawing from either a straight or a curved edge, depending on what kind of pattern I wanted.
Both sides of every piece was marked with stitching lines, I drew just one line at a time so they would not become wonky or fade over time. When one line was quilted and done, I took my magic marker pen and my compasses and dotted the next line, measuring even distance from the last one. This may sound like a lot of work, but it was fine, slow but satisfactory. One important part of the human perception of beauty is the harmony of symmetrical lines, our brains just love even lines and patterns. Our attention is drawn to anything that is slightly off, but what is even, our eyes can rest upon.
And speaking of rest – Thank you for reading this far! I think this will have to be enough for today. In next post I’ll write some more about the construction, mounting of sleeves, fitting, buttons and buttonholes and… Well, there is a lot more to say. Untill then, here is a proper picture of the panzar from the first time it was used, and yes, soaked. Why that happened is another story, for another day.

Photo: Cajsa Lithell, @larpology

Pingback: Panzar I | Panzarsork
A second post already! Excellent!
I, too, have no evidence for the use of frames to make quilted armour. However, it very much makes sense. It does seem like it would make a lot of sense, though. This is especially true for garments (military or civilian) padded with cotton fibre rather than fabric. Tasha Kelly talks about that here: http://cottesimple.com/articles/patterns-padding-quilting/
That type of frame, at least when used for embroidery, is called a ‘slate frame’ in English, btw. I have no idea why…
Anyway, it was great to see more about this project and especially to see the progress photos. Although I have no plans to ever make one of these, if I was going to those would be super-useful.
Thanks for writing, I enjoyed reading this and the 1st part. I have had linen set aside for this same project for many years (about 5 or so) and still haven’t gotten to it yet. Maybe one day soon, as it is inspiring to see your process being done.
Cheers,
Hugh
Thanks, I’m so glad you like it! Looking forward to see your work on something similar in the future, the way you do things I’m sure it’s going to be amazing.
WOW this is amazing! Thank you for sharing your fantastic work. I love the progress photos they are very helpful. I might try sewing something similar for my hubbie.